
Chapter 1: Getting Started w/ OBS
From Download to First Scene: An Introduction to OBS Studio

Introducing OBS
OBS (Open Broadcaster Software) Studio is an open-source software application available on a variety of platforms that allow user to screen cast and live stream. It also offers a variety of plugins that can enhance your live stream as well and simply some processes that might otherwise take a little more work, but we will get there in good time, I just wanted to tease some of the future things I plan to cover.
But I think in this first chapter I want to do an introduction to OBS for those who may not be familiar with the program and walk you through the steps of downloading the program, adding the necessary media sources, and creating your first scene. I’ll include a diagram below that shows how these things are connected to your real-world hardware so you can get an idea for how it all fits together.
Things You’ll Need
I previously wrote a post looking at a list of gear for churches in 2026. If you want to take a look at it, you can do so by clicking here. For now, here are the essentials:
Without being too obvious, a desktop computer running Windows 10 or 11.
Keyboard and Mouse
A copy of OBS, which can be downloaded for free from their website.
Download the Windows copy of the program.
Step 1: Installing OBS

Using the link above, go to the OBS website.
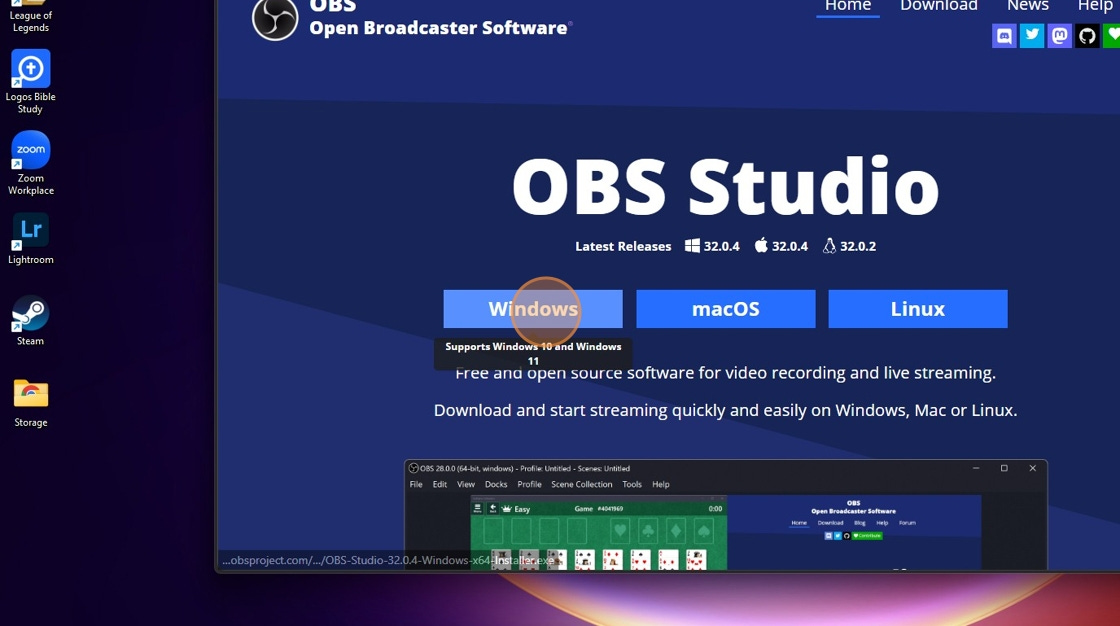
Click “Windows.” As mentioned, this guide will focus on the Windows version of OBS Studio, not the macOS version.
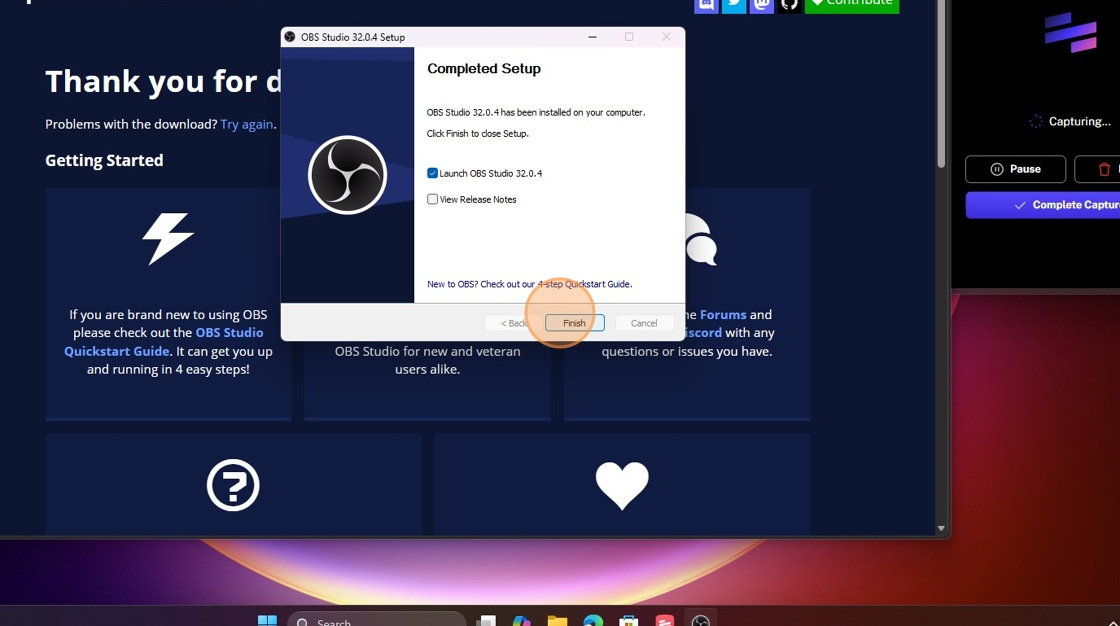
Run the installer from your Downloads folder or internet browser window and complete the steps as prompted. When you reach the end, click “Finish.”
Step 2: Initial OBS Setup
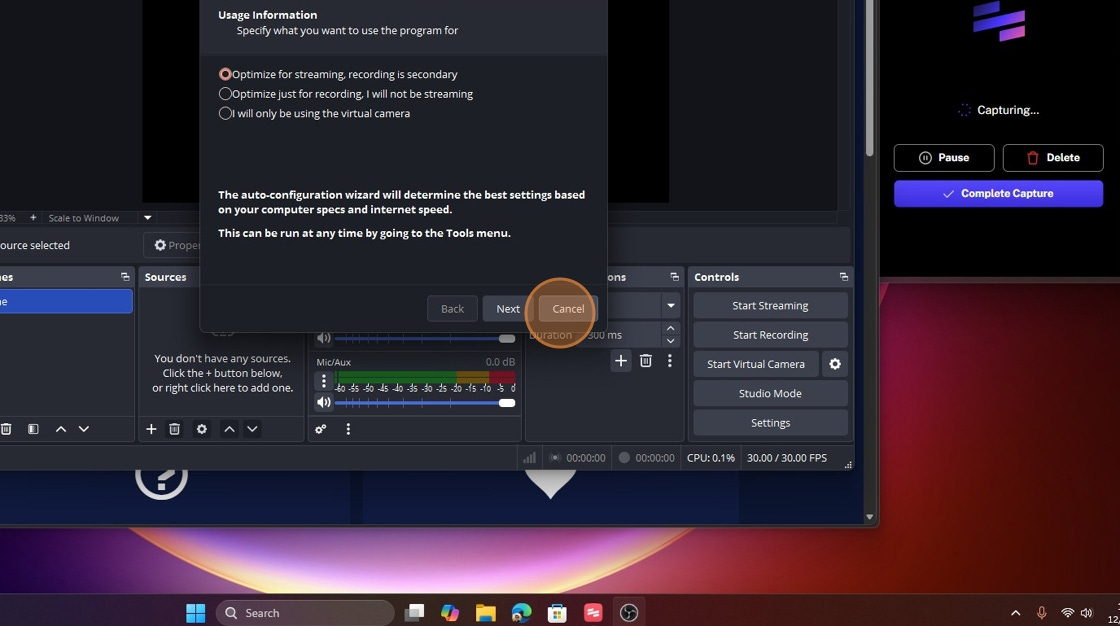
OBS should launch if you left the option checked in the previous step. When running OBS for the first time, you will be greeted by a window prompting you to run an auto-optimizer. For now, we will skip this step so I can walk you through the setup manually.
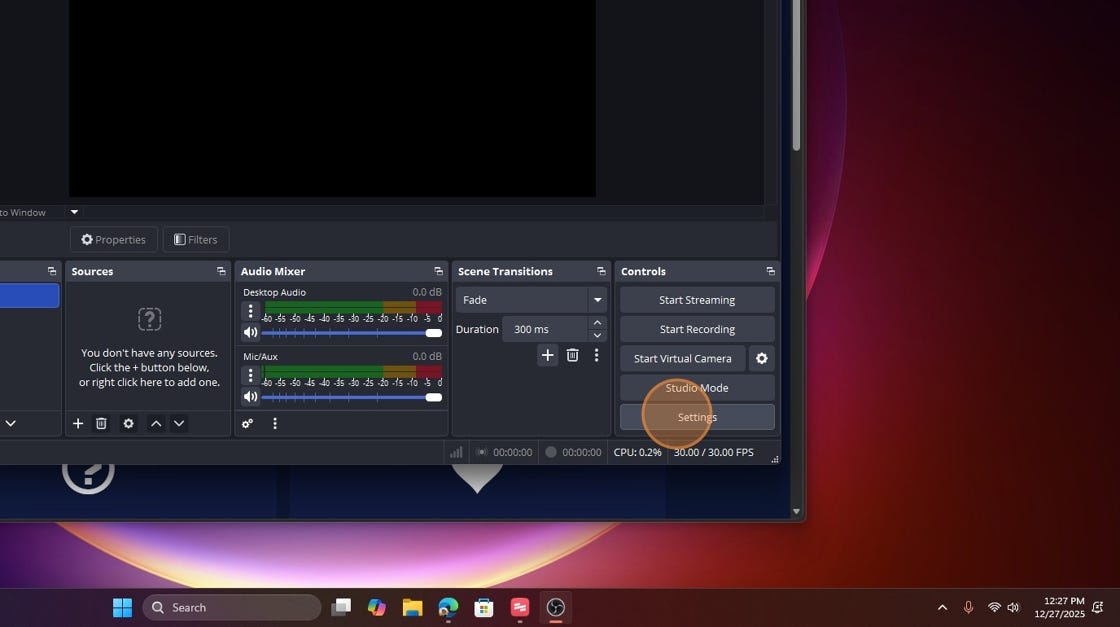
On the right-hand side, you should see a Controls window with “Settings” listed at the very bottom. Click the “Settings” button in the Controls window.
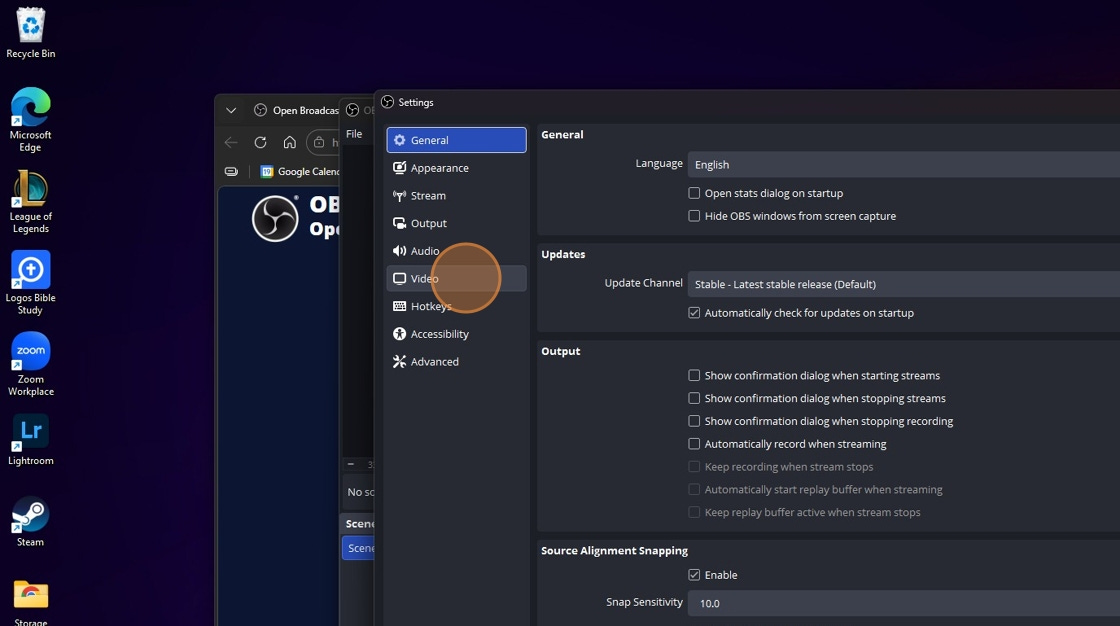
Click the “Video” option in the Settings window.
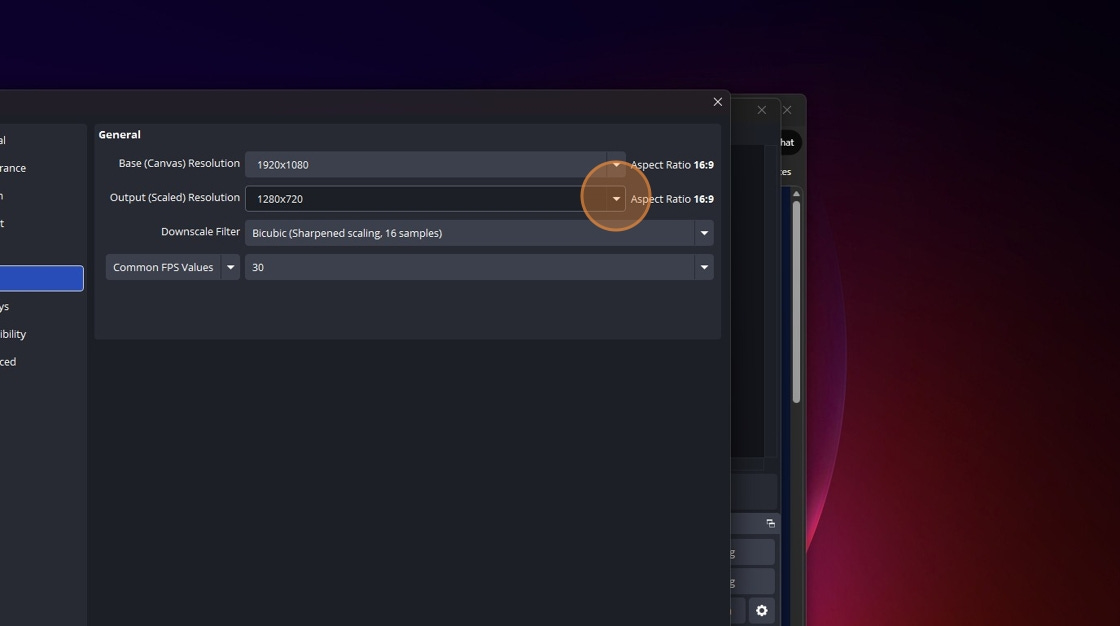
We are going to set you up for streaming at 1920x1080, which is standard high definition for most mobile devices. You do not need to worry about streaming at anything above what is commonly known as 1080p. Streaming in 4K is not necessary and will not be utilized by the majority of viewers.
Click the down arrow and change “1280x720” to “1920x1080.”
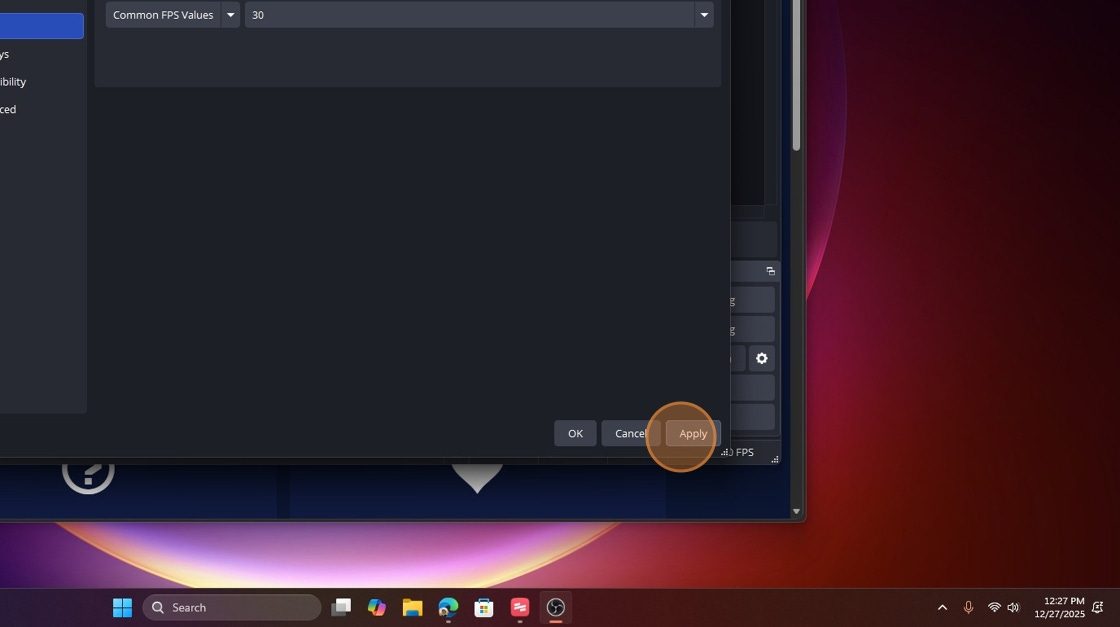
Click the “Apply” button to finalize the change.
Step 3: Adding Audio Input Device

Next, we are going to add your audio input device. This is the device that captures audio from your mixer and other microphones, such as ambient mics, and uses it as your input source for streaming.
In that same Settings window, click “Audio,” which is located just above “Video.”
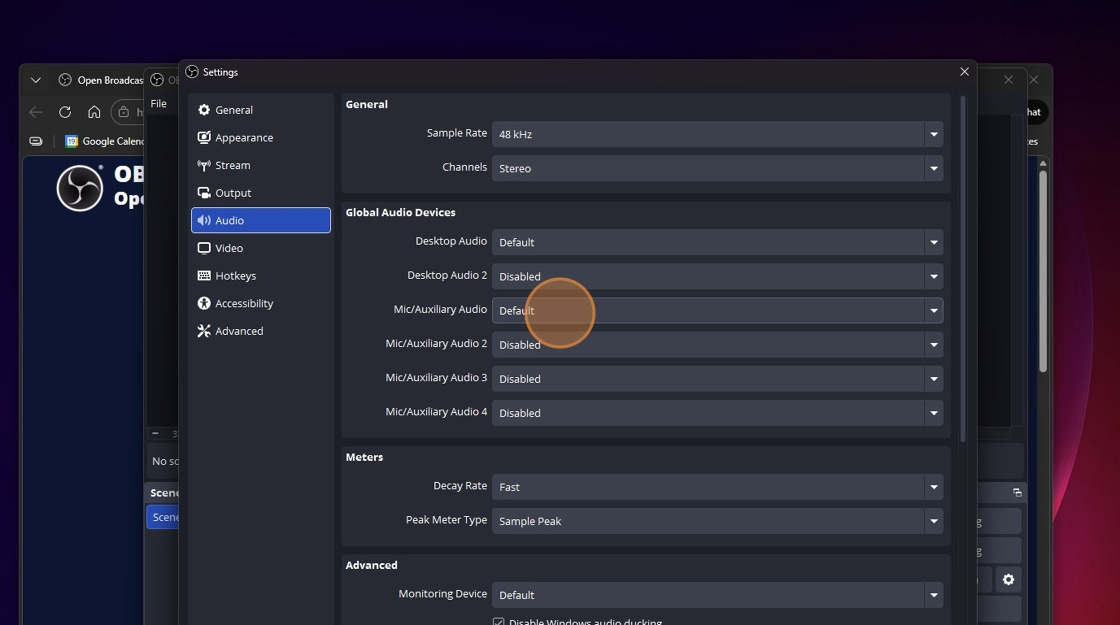
Look for the “Global Audio Devices” section. After you locate it, look for “Mic/Auxiliary Audio,” which should show a value of “Default.”
Select your audio interface (make sure it is powered on and recognized by the computer) and choose it as the device listed under “Mic/Auxiliary Audio.” After doing so, click the “Apply” button again, just as you did in the previous video step.
Step 4: Setting Up Your First Scene
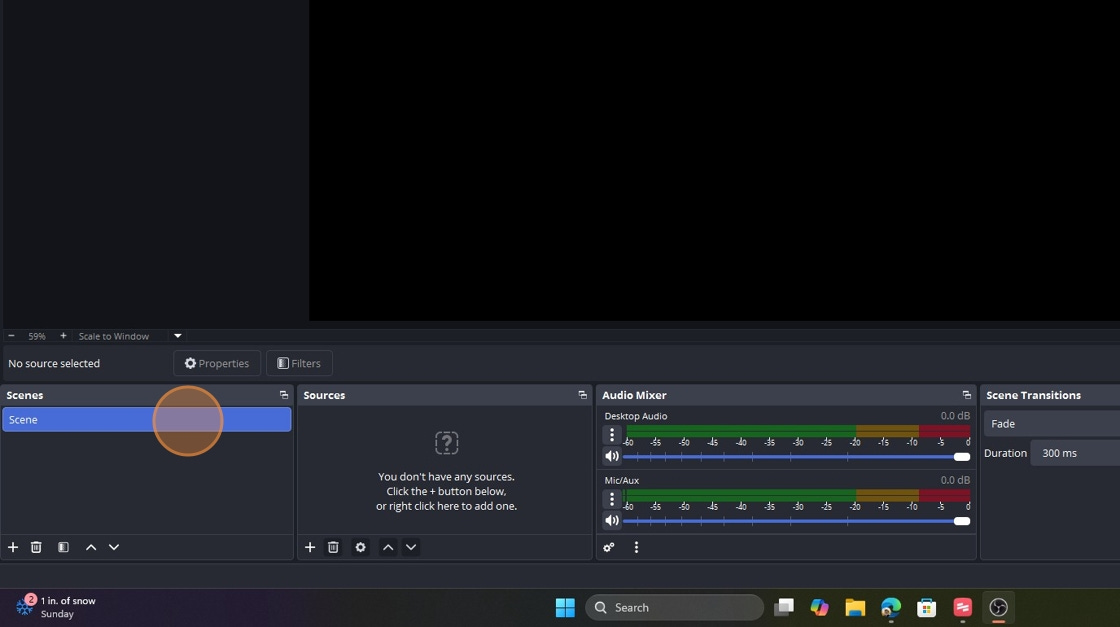
By default, OBS starts with one “Scene” in the “Scenes” panel. OBS requires that at least one scene be present.
Now is a great time to develop the habit of organizing and naming elements in OBS. This will not only help later when you begin adding shortcuts to a device like the Elgato Stream Deck, but it will also help you keep track of your production, scene elements, and any other media you add.
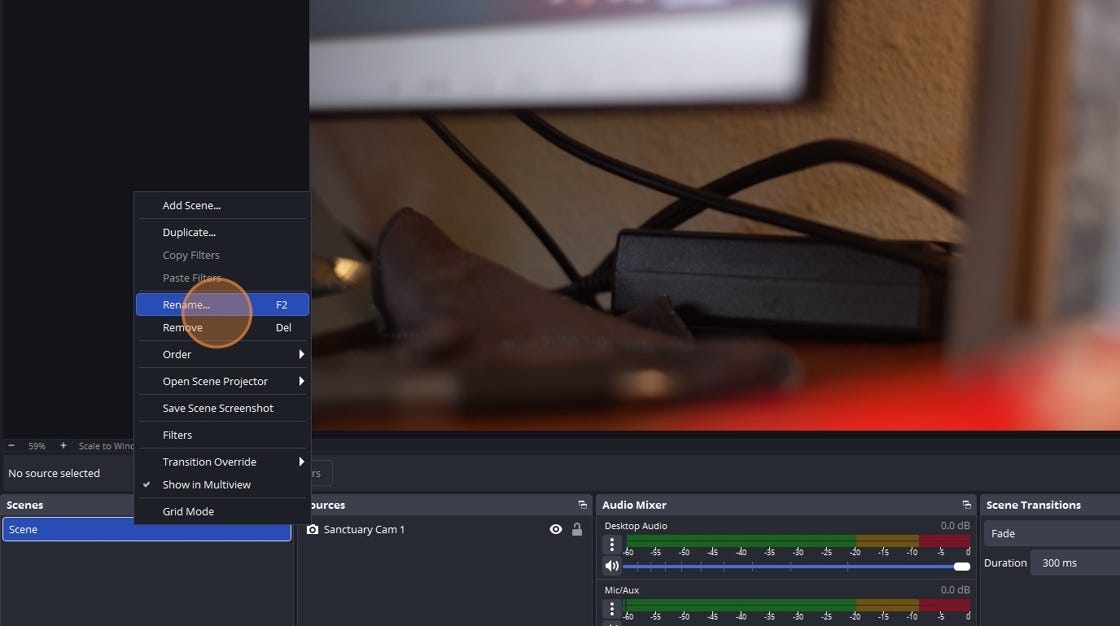
To retitle a scene or other elements such as sources, right-click the item you want to rename. You will then be able to enter a new name for that item. For example, you might want to name the first scene something simple like “Sanctuary,” or choose a name that clearly reflects what the scene will show. In a single-camera setup, some examples might include Video, Slides, or Video + Slides.
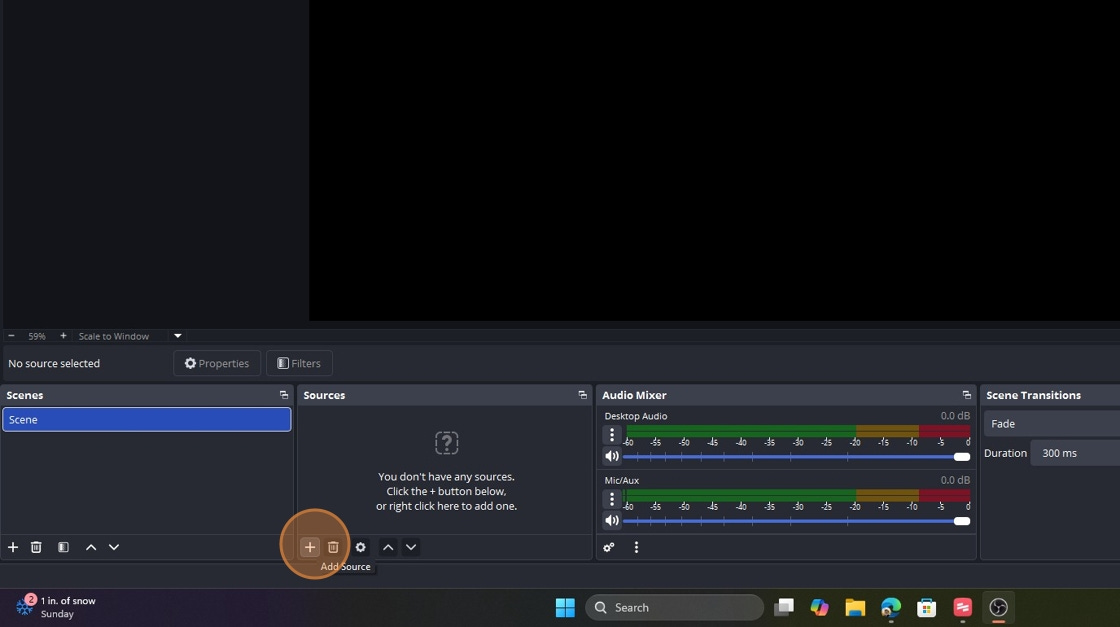
Once you name your initial scene, we can move on to adding your first source, your video source. Next to the “Scenes” panel, you will see the “Sources” panel. Click the “+” button next to the trash can icon in that panel.
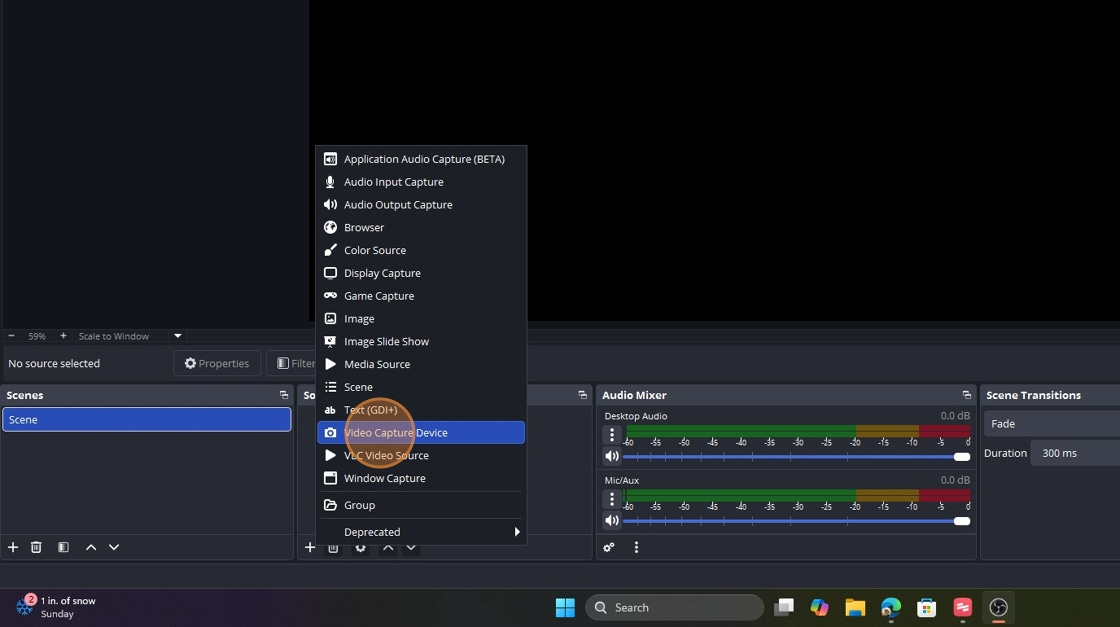
In the pop-up menu, locate and click the “Video Capture Device” option.
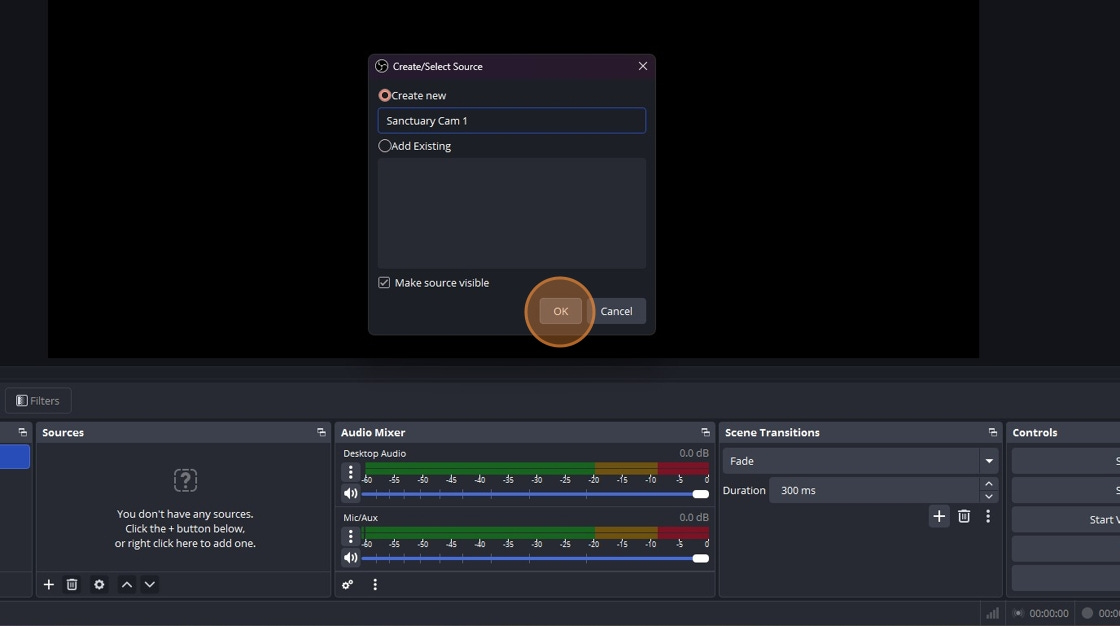
Like your scenes, you will want to be diligent about naming your sources. In the example above, I call it “Sanctuary Cam 1,” but you can name it something else if you have a specific location or purpose for your camera. Once you name it, click “OK.”
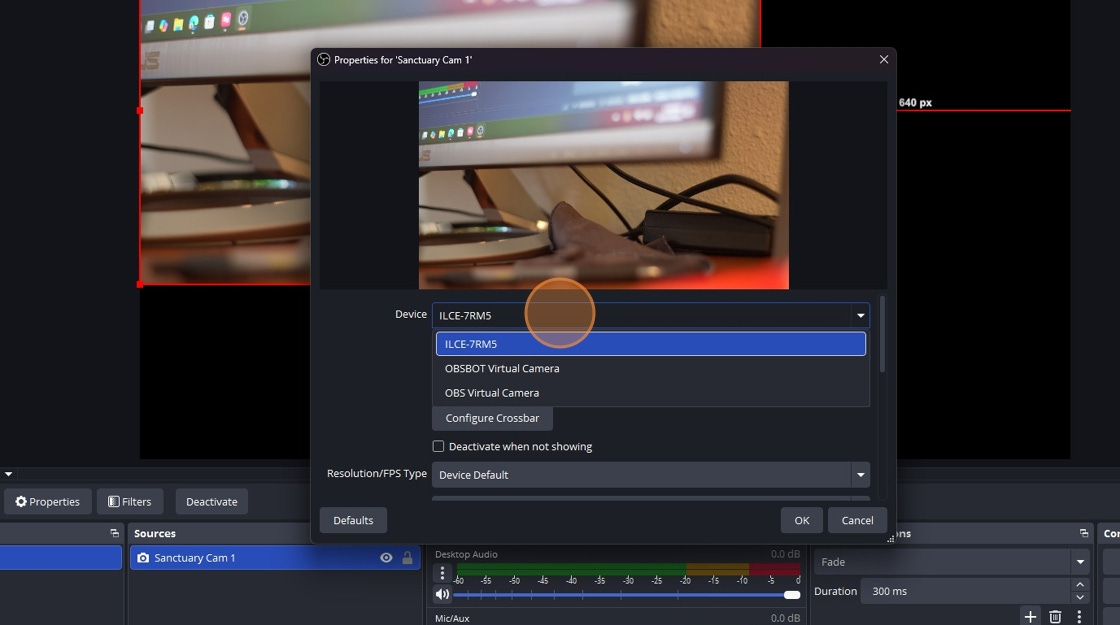
A new window will pop up, and you may see video playing behind it. You will see “Device” listed at the top of the window, underneath the video preview. Click the drop-down menu to ensure you select the correct video device. Once you confirm it is the camera you want, click “OK.”
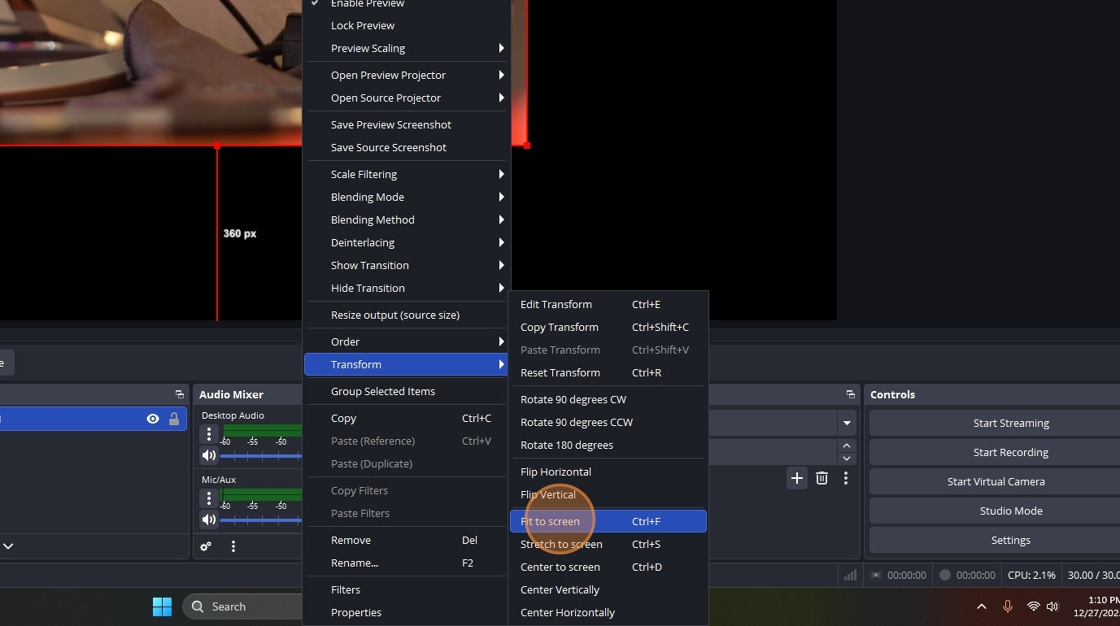
You may encounter an issue where your newly added video source does not fill the entire canvas. In the example above, there is a significant amount of black space between the camera video and the full 1920x1080 canvas that viewers will see. We can fix this by right-clicking the video preview on the canvas. This will bring up a list of options. Look for “Transform,” move your mouse over it, and click “Fit to Screen.” This will resize your video source to fill the canvas, assuming your video source is also in a 16:9 format.
Step 5: You Set Up Your First Scene!
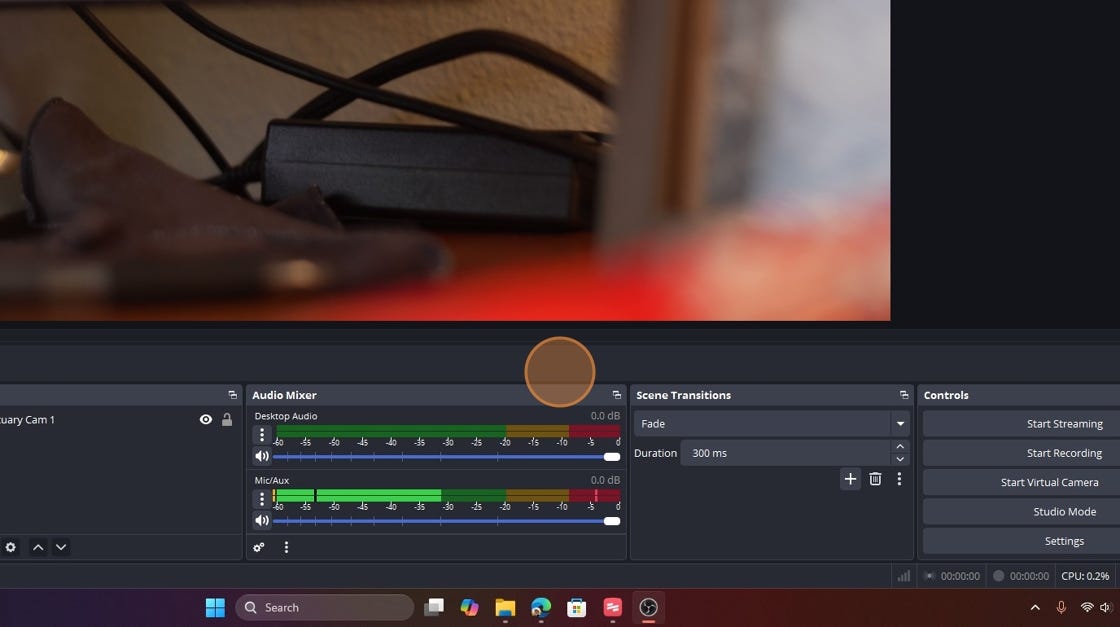
And there you go; your first scene is done. You should now see video, and if your audio source is turned on, you should also see input coming in, as shown in the picture above. You can see that the audio signal is present on both the L and R channels, which means it is mono, not stereo. In my experience, this makes for a better viewing experience.
You can now go live if you wish, and I will show you how to do that in the next full chapter, which will focus on connecting OBS to YouTube. There will also be an in-between chapter that focuses on setting up a YouTube account, if you do not already have one, or if you want to create an account specifically for livestreaming.
Additional Tip: Fixing Stereo Sound
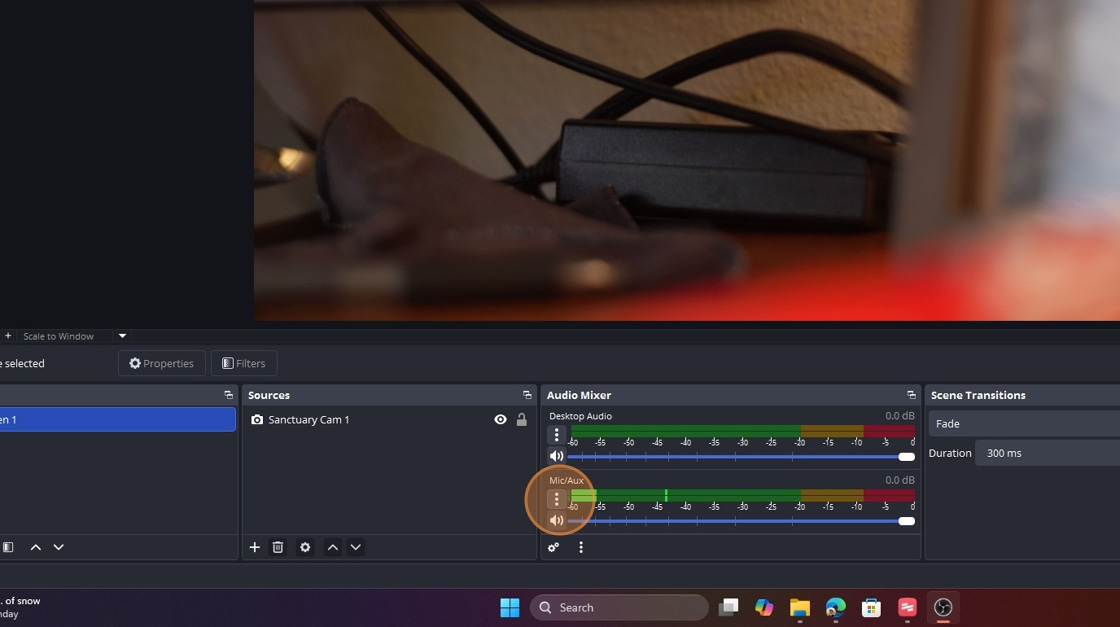
If you notice that the audio level is not moving evenly (meaning the top and bottom of the meter are moving at different rates or intensities), it likely means you have a stereo audio setting. This results in different volume levels in the left and right channels, which can be distracting for livestream viewers.
To fix this, locate “Mic/Aux” under the “Audio Mixer” panel. Click the three vertical dots, as shown in the image above.
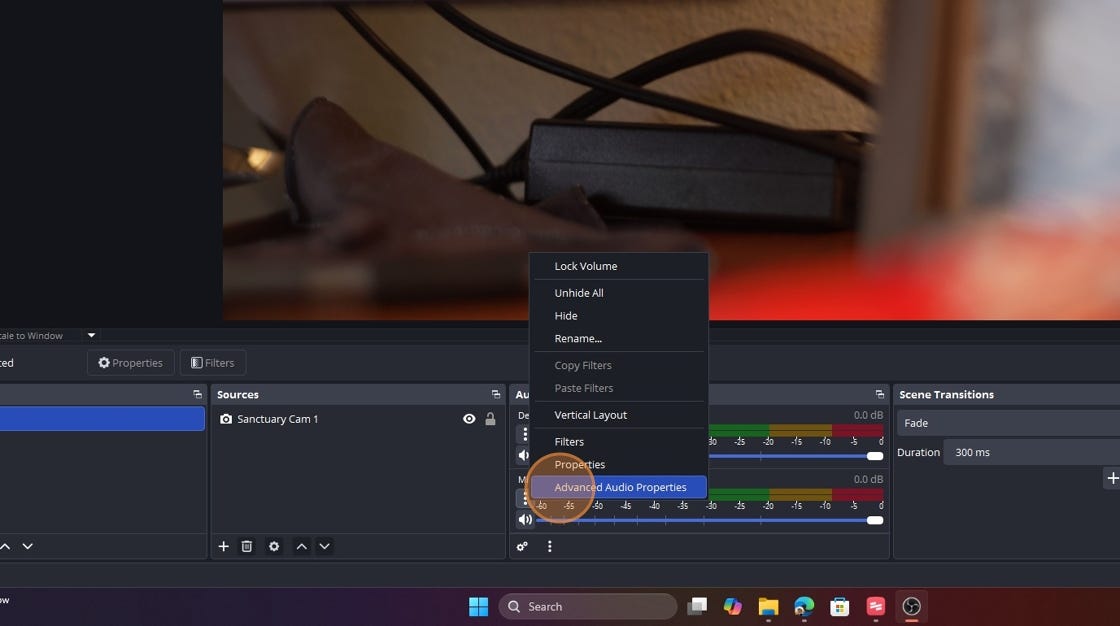
You can then click “Advanced Audio Properties.”
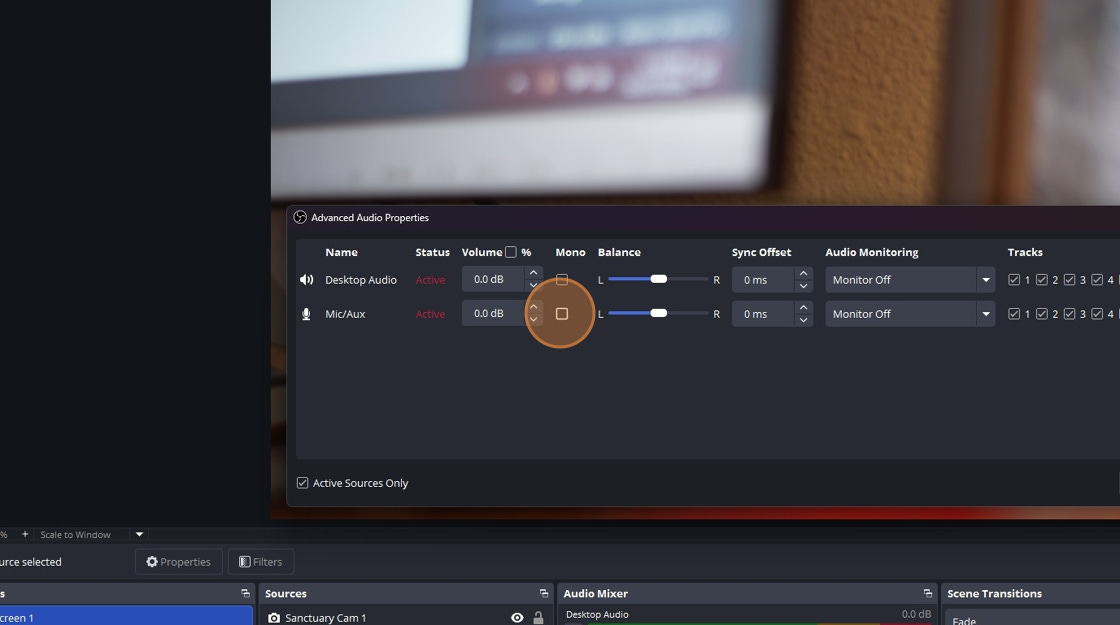
You can then click the checkbox under the “Mono” column. This will mix the audio into a mono format so the sound is the same in both ears when listening with headphones or through speakers.
*If you find this ever-evolving guide helpful, a tip is always appreciated. My hope is to keep these resources free and accessible to churches as they expand their ministry, rather than placing them behind a paywall.
**If you have a topic you would like me to cover in future OBS tutorials, let me know in the comments below.